Nonagon Drawing Made Easy! The Ultimate Step-by-Step Guide
Understanding geometry provides the foundation for complex constructions, and a compass and straightedge represent essential tools. The process to draw a nonagon accurately might seem daunting at first, but with practice and understanding of geometric principles, anyone can succeed. A thorough grasp of polygons helps the artist understand its shape, making it easier to draw a nonagon. This guide will help you.
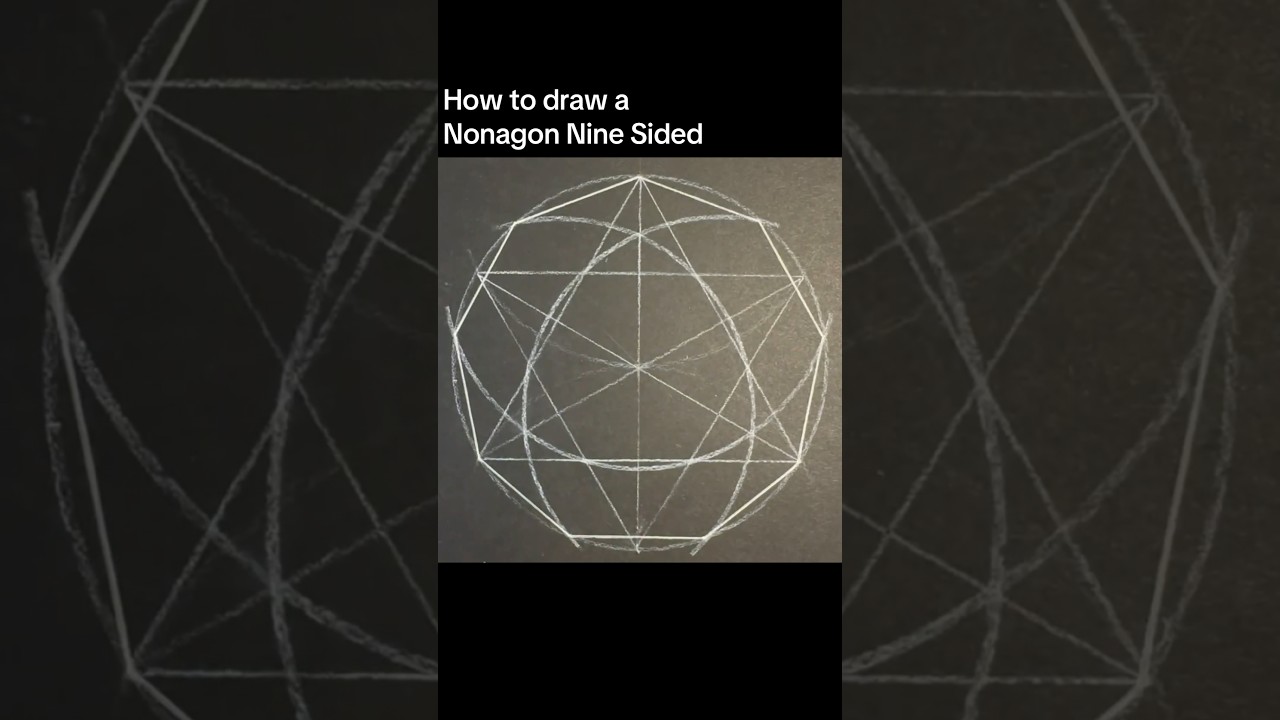
Image taken from the YouTube channel Quentin Carpenter Natureofflowers , from the video titled How to draw a Nonagon .
Welcome to the intriguing world of geometry, where shapes dance and angles sing! Today, we embark on a journey to explore a particularly fascinating figure: the nonagon.
This nine-sided wonder, with its nine angles, might seem intimidating at first glance, but fear not! We're here to demystify the nonagon and guide you through the process of drawing one yourself.
What is a Nonagon?
At its core, a nonagon is simply a polygon with nine sides and nine angles. The term "nonagon" is derived from "nona" (Latin for "nine") and "gon" (from Greek "gonia," meaning "angle").
Each of these sides connects to form a closed shape, and the sum of the interior angles in a nonagon always equals 1260 degrees.
The Nonagon in the Polygon Family
Polygons, those closed two-dimensional shapes with straight sides, come in a stunning variety. Triangles boast three sides, quadrilaterals have four, pentagons sport five, and so on.
The nonagon, with its nine sides, occupies a unique space within this diverse family. It's more complex than a square or hexagon but still falls within the realm of manageable geometric constructions.
Your Gateway to Geometric Art
Forget the notion that drawing geometric shapes is only for mathematicians or engineers! We're about to reveal a simple, step-by-step guide that will empower you to draw your very own nonagon with ease.
We will break down the process into manageable steps, ensuring that anyone can create this nine-sided wonder.
Unleash Your Inner Artist
Drawing geometrical shapes can be incredibly fun and rewarding. It's a chance to engage with mathematical principles in a visual and creative way.
As you follow our guide, you'll not only learn how to draw a nonagon, but you'll also gain a deeper appreciation for the beauty and elegance of geometry. So, grab your tools, prepare to be amazed, and let's begin!
Drawing a nonagon, or any geometric shape with precision, requires the right tools. Think of it as an artist preparing their canvas and brushes – the tools set the stage for the masterpiece to come. Having the appropriate instruments isn't just about making the task easier; it's about ensuring accuracy and achieving the desired result.
Gather Your Arsenal: Essential Tools for Nonagon Construction
Just as a seasoned chef relies on quality knives and cookware, a budding geometer needs reliable tools to craft accurate shapes. Drawing a nonagon demands precision, and that precision hinges on the instruments you choose. Let’s explore the essential tools you’ll need for your nonagon-drawing expedition.
The Core Trio: Compass, Ruler, and Protractor
These three tools form the bedrock of geometric construction. Mastering their use is crucial for anyone venturing into the world of polygons and shapes.
-
The Compass: Your Circle-Drawing Companion
The compass isn't just for drawing circles; it's also essential for creating arcs and transferring measurements accurately. A good compass should hold its radius firmly, preventing unwanted slips that could ruin your construction. Why is the compass so important? It allows you to create the foundation circle on which your nonagon will be based, and it's instrumental in ensuring equal distances and proportions.
-
The Ruler: Straight Lines are Key
The ruler is your steadfast guide for drawing straight lines. Look for a ruler with clear, precise markings in both inches and centimeters. A transparent ruler can be helpful, allowing you to see the points you're connecting. Why does line accuracy matter? Straight, precisely drawn lines are crucial for defining the sides of your nonagon and achieving a clean, professional-looking result.
-
The Protractor: Mastering Angles
A protractor is your go-to tool for measuring angles. It's essential for accurately marking the points on your circle that will define the vertices of your nonagon. Choose a protractor with clear degree markings and a smooth rotating arm for precise angle placement. Why are accurate angles important? In a regular nonagon, each central angle measures 40 degrees, and a protractor ensures you mark these angles accurately, leading to equal sides and a symmetrical shape.
The Importance of Precision
In geometric constructions, even the slightest error can compound and lead to inaccuracies in your final shape. Therefore, it's crucial to use your tools with care and precision. Take your time, double-check your measurements, and avoid rushing through the process.
Remember that patience and attention to detail are just as important as the tools themselves.
Optional Tools for the Enthusiast
While a compass, ruler, and protractor are the essential tools, some optional tools can enhance your geometric drawing experience. These include specialized compasses (such as beam compasses for drawing large circles) and drafting triangles. However, for drawing a basic nonagon, the core trio will suffice.
Geometry Basics: An Essential Foundation
While tools are critical, understanding the underlying geometric principles is equally important. Familiarize yourself with concepts such as angles, radii, and the properties of polygons. This knowledge will empower you to use your tools more effectively and troubleshoot any challenges you encounter along the way. Why is basic knowledge important? A basic understanding of geometrical principles transforms the process from simply following steps to a rich, intuitive understanding of the shape being constructed.
Drawing straight lines and measuring angles are essential, but they are merely preparatory steps. The true test lies in assembling these elements to bring our nine-sided vision to life. Let's transition from gathering our tools to the exciting process of constructing a regular nonagon, step-by-step.
Step-by-Step Guide: Mastering the Regular Nonagon
Ready to put those tools to work? Drawing a regular nonagon might seem daunting, but by breaking it down into manageable steps, it becomes an achievable and even enjoyable task. This guide provides a clear, easy-to-follow method using a compass, ruler, and protractor. Let's begin!
Step 1: Drawing the Foundation Circle
The circle serves as the canvas upon which our nonagon will take shape.
-
Using your compass, draw a circle.
The radius of this circle will directly influence the size of your final nonagon. Choose a radius that suits your desired outcome.
-
Ensure your compass is stable to maintain a consistent radius throughout the drawing process. A shaky compass can lead to inaccuracies later on.
Step 2: Calculating the Central Angle
Mathematics plays a crucial role in geometric constructions. To create a regular nonagon, where all sides and angles are equal, we need to calculate the central angle.
-
Divide 360 degrees (the total degrees in a circle) by 9 (the number of sides in a nonagon).
This gives us 40 degrees. This 40-degree angle is the central angle that each side of the nonagon will subtend at the center of the circle.
-
The formula is simple: 360° / number of sides = central angle. In the case of a nonagon, that's 360° / 9 = 40°. Keep this number in mind for the next step.
Step 3: Marking the Angles on the Circle
Now comes the precise application of our calculated angle. The protractor is our best friend here.
-
Use your protractor to carefully mark nine points on the circle. Each point should be exactly 40 degrees apart.
-
Start by marking a point at 0 degrees (or any reference point on your circle). Then, measure 40 degrees from that point and make another mark.
-
Continue this process, measuring 40 degrees from each subsequent mark, until you have nine evenly spaced points around the circumference of the circle.
-
Accuracy is paramount in this step. Small errors in measurement will accumulate and result in an irregular nonagon. Take your time and double-check each angle.
Step 4: Connecting the Points to Form the Sides
With our points precisely marked, it's time to give our nonagon its shape.
-
Using your ruler, connect the marked points on the circle with straight lines. Each line segment will form a side of the nonagon.
-
Carefully align the ruler with two adjacent points and draw a straight line connecting them. Repeat this process for all nine points, working your way around the circle until you complete the polygon.
-
Maintain precision while drawing each line. A slight wobble can distort the shape of the nonagon.
Step 5: Verification and Refinement
Our nonagon is now taking shape, but before we declare victory, let's ensure its accuracy.
-
Check the accuracy of your drawn nonagon. Visually inspect the sides and angles. Ideally, they should appear roughly equal.
-
Measure the length of each side with your ruler. They should be very close in length. If not, identify areas where your measurements may have been off and make subtle adjustments.
-
You can also use your protractor to measure the interior angles of the nonagon. In a regular nonagon, each interior angle should measure 140 degrees.
-
Don't be afraid to make small corrections. Geometry is about precision, and even slight adjustments can make a significant difference in the final result.
Drawing straight lines and measuring angles are essential, but they are merely preparatory steps. The true test lies in assembling these elements to bring our nine-sided vision to life. Let's transition from gathering our tools to the exciting process of constructing a regular nonagon, step-by-step.
Tips and Tricks for Nonagon Perfection
Achieving a truly perfect regular nonagon takes more than just following steps. It requires a keen eye, a steady hand, and an understanding of the subtle nuances that can make or break your geometric creation. Let's explore some invaluable tips and tricks to elevate your nonagon from good to exceptional.
Mastering Your Tools: The Compass and Ruler
The compass and ruler are your most trusted allies in this endeavor. Understanding how to wield them with precision is paramount.
Compass Stability: The Key to Circularity
A wandering compass point can sabotage your entire construction. Ensure your compass is firmly planted and doesn't slip during the circular motion. Consider using a compass with a rubber or suction cup base for extra stability, especially on smooth surfaces.
Periodically check the compass point and pencil lead tightness. A loose lead will lead to variations.
The Ruler's Role: Straight Lines Defined
A ruler seems simple, but its proper use is crucial. Always hold the ruler firmly in place to prevent it from shifting while drawing lines.
Use a sharp pencil to trace along the edge of the ruler. Dull pencils create thicker lines, introducing inaccuracies.
Avoiding Parallax Errors: See It Right
Parallax error occurs when your eye is not directly aligned with the measurement markings. Always position your eye directly above the point you are measuring to ensure accurate readings on both your protractor and ruler.
Embracing Geometric Principles
Drawing a nonagon isn't just about following instructions. It’s also understanding the underlying geometric principles. Knowing why you’re performing each step will greatly improve your accuracy.
Understanding angle relationships, circle properties, and the definition of regular polygons will provide a deeper appreciation for the construction process. This foundational knowledge leads to better results.
Ensuring Equal Sides and Angles
The hallmark of a regular nonagon is, of course, the equality of its sides and angles. Here are some techniques to help achieve this:
-
Incremental Checks: Don’t wait until the end to verify your work. After drawing each side, briefly compare its length to the previous ones.
-
Angle Bisection (Optional): For advanced precision, consider bisecting the central angles. It is to create a finer grid for marking points. This adds extra steps but dramatically improves accuracy.
-
Visual Inspection: Step back and visually assess your nonagon. Does it appear symmetrical? Are there any obvious deviations in side length or angle? Trust your instincts!
Remember, practice makes perfect. Don't be discouraged if your first few attempts are not flawless. Keep refining your technique, and soon you'll be drawing regular nonagons with confidence and precision.
Drawing straight lines and measuring angles are essential, but they are merely preparatory steps. The true test lies in assembling these elements to bring our nine-sided vision to life. Let's transition from gathering our tools to the exciting process of constructing a regular nonagon, step-by-step.
Beyond Regularity: Exploring the Realm of Irregular Nonagons
Having mastered the art of crafting a regular nonagon, with its harmonious symmetry and equal proportions, it's time to peek beyond the confines of perfection and venture into the fascinating world of irregular nonagons.
What Defines an Irregular Nonagon?
Unlike their regular counterparts, irregular nonagons do not demand uniformity.
Think of them as the rebels of the nonagon family, where sides can be of varying lengths, and angles can possess diverse measures.
The defining characteristic is simply the presence of nine sides and nine angles—anything beyond that is open to creative interpretation.
The Constant and the Variable: Sides and Angles
It's crucial to understand that the fundamental characteristic of any nonagon, regular or irregular, is that it has nine sides and nine angles.
This is the invariant property.
What changes between the two types of nonagons is whether those sides and angles are equal.
In regular nonagons, they are; in irregular nonagons, they are not.
Visualizing Irregularity: An Example
Imagine a shape that resembles a star, but with nine points, each connected by a straight line.
Or picture a nonagon where some sides are long and others are short, creating an unbalanced, almost chaotic appearance.
This embodies the essence of an irregular nonagon.
It adheres to the nine-sided rule, but liberates itself from the constraints of regularity.
Appreciating the Diversity
Irregular nonagons remind us that geometry isn't always about perfect symmetry.
It’s about exploring the endless possibilities within defined parameters.
They celebrate the beauty of asymmetry and demonstrate how shapes can maintain their identity even when deviating from strict rules.
Video: Nonagon Drawing Made Easy! The Ultimate Step-by-Step Guide

FAQs: Nonagon Drawing Made Easy!
Here are some common questions readers have about drawing a nonagon using our guide.
What if I don't have a protractor?
While a protractor makes it easier to divide the circle into accurate segments for a nonagon, you can approximate. Using a ruler, try to visually divide the circle into nine roughly equal parts. The resulting shape won't be perfect, but it will resemble a nonagon. Practice helps when you draw a nonagon freehand!
Why use a circle to draw a nonagon?
Using a circle as a guide helps ensure all sides of the nonagon are approximately equal in length. This is because the vertices (corners) of the nonagon are evenly spaced around the circumference of the circle before you connect them. It's a simple and effective method to draw a nonagon that looks balanced.
What is the angle measurement between each vertex of a regular nonagon?
In a regular nonagon, each interior angle measures 140 degrees. This is important if you are using a protractor to accurately mark the points on your circle before you draw a nonagon.
Can I use this method to draw other polygons?
Yes! The principle of dividing a circle into equal segments works for drawing many different polygons. The number of segments simply corresponds to the number of sides of the polygon you want to draw. Just calculate the angle between each vertex (360 degrees divided by the number of sides) and use that for precise measurements as you draw a nonagon or any other polygon.
Alright, now you know how to draw a nonagon! Go forth, practice a bit, and impress your friends with your newfound nonagon-drawing skills!