Carrot Propagation: Grow Carrots From Carrot Tops!
Carrot tops, often discarded, actually hold the key to carrot propagation, an accessible method for expanding your garden. The USDA provides resources and guidelines that support sustainable gardening practices, which directly benefits techniques like carrot propagation. Hydroponics, a method of growing plants without soil, offers an alternative approach for those looking to experiment with carrot propagation in controlled environments. For enthusiasts eager to dive deeper, institutions such as the Royal Horticultural Society offer extensive information on root vegetable cultivation and propagation techniques.

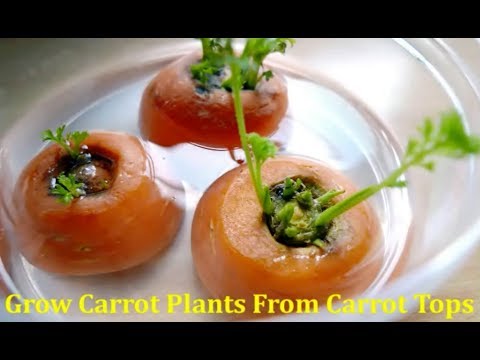
Image taken from the YouTube channel Mama Judy & Son , from the video titled How to grow your own Carrots by @Judybaogarden .
Getting Started: Sprouting New Life from Carrot Tops
Ever tossed those carrot tops, the leafy green crowns, into the compost bin without a second thought? What if I told you that you could coax those seemingly useless scraps into a vibrant display of fresh, edible greens?
It’s true! Regrowing carrot greens from kitchen scraps is a surprisingly simple and rewarding activity.
It’s a fantastic way to dip your toes into the world of plant propagation. Plus, you’re repurposing something that would otherwise be waste.
The Magic of Regrowth: A Simple Process
The process is delightfully straightforward. It starts with a fresh carrot top, a shallow dish of water, and a sunny windowsill.
You simply place the carrot top in the water, ensuring the bottom is submerged. Then, with a little patience, watch as new green shoots emerge from the top and roots begin to sprout from the bottom.
Once the roots are established, you can transplant the carrot top into soil. Then, you'll nurture it into a thriving patch of carrot greens.
More Than Just a Green Thumb: The Perks of Regrowing
There are several compelling reasons to give this a try:
-
Reducing Waste: It’s a small step towards a more sustainable lifestyle, turning food waste into something useful and beautiful.
-
A Fun Experiment: It's a captivating project for kids and adults alike. It offers a hands-on lesson in botany and the life cycle of plants.
-
Edible Greens: Carrot greens are surprisingly versatile. They can be used in salads, pesto, soups, and more.
A Word of Caution: Managing Expectations
Now, before you get visions of a bountiful carrot harvest, let's set the record straight: you're unlikely to grow a new carrot root from a carrot top.
The goal here is to cultivate the greens, not the root.
Think of it as a way to enjoy fresh, homegrown produce from something you'd normally discard. It’s a fun and eco-friendly experiment. The aim is to bring a touch of green into your home. And it offers an opportunity to learn about the wonders of plant propagation.
Understanding Vegetative Propagation
So, you're about to embark on a cool experiment, turning carrot tops into leafy greens. But have you ever wondered why this even works? It's all thanks to a fascinating natural process called vegetative propagation, which is way simpler than it sounds. Let's dive into the science behind it, so you can impress your friends with your botanical knowledge while you regrow your carrot tops!
What is Vegetative Propagation, Anyway?
Vegetative propagation is basically a plant's superpower: the ability to create new plants from existing plant parts – roots, stems, or even leaves, instead of seeds.
Think of it as cloning, but in a good, plant-loving way. It's how that strawberry plant sends out runners to create new baby strawberry plants, or how you can grow a new African violet from a single leaf cutting. Plants are clever like that!
Carrot Tops: Little Regrowth Powerhouses
Now, how does this apply to our carrot tops? Well, the carrot top, or crown, contains cells that are still capable of developing into new growth. When you give it the right conditions – water, light, and a bit of patience – these cells wake up and start producing new shoots and roots.
It's not magic, but it sure feels like it! The carrot top already contains the blueprint for new growth, it just needs a little encouragement to get going.
Remember, while you'll get beautiful greens, it's unlikely you'll get a whole new carrot root. The plant is primarily focusing on leaf production using the energy stored in the original carrot top.
Seeds vs. Vegetative Propagation: A Quick Comparison
Most plants can reproduce through seeds, but that's a whole different ballgame.
Seed reproduction involves the combination of genetic material from two parent plants, leading to offspring with a mix of traits. Think of it like mixing two paint colors – you get something new and unique.
Vegetative propagation, on the other hand, creates a genetic copy of the parent plant. It's like photocopying a document – you get an exact duplicate.
This is why the greens you regrow from your carrot top will be genetically identical to the original carrot plant. Cool, right?
Understanding vegetative propagation not only makes your carrot top regrowing project more interesting, but it also gives you a glimpse into the amazing world of plant biology. Now, let's get those carrot tops ready for their second life!
Gathering Your Supplies: Setting the Stage for Greenery
So, you're about to embark on a cool experiment, turning carrot tops into leafy greens. But have you ever wondered why this even works? It's all thanks to a fascinating natural process called vegetative propagation, which is way simpler than it sounds. Let's dive into the science behind it, so you can impress your friends with your botany knowledge.
Before diving into the process, it's crucial to gather the right tools. Think of it as prepping your kitchen before baking a cake. Having everything at hand makes the experience smoother, more enjoyable, and significantly increases your chances of success.
Here's a comprehensive list of what you'll need to get started on your carrot-growing adventure:
Essential Materials: Your Carrot-Growing Toolkit
The Star of the Show: A Fresh Carrot Top (Crown)
This is where your journey begins! Selecting the right carrot top is crucial. You're looking for the crown, the top inch or two of the carrot where the greens were attached.
- Selection Tips: Choose carrot tops that are firm and show signs of life – maybe a few small green shoots already emerging. Avoid those that are mushy, dried out, or moldy.
- Freshness Matters: The fresher the carrot top, the better its chances of sprouting new growth. If possible, use tops immediately after cutting them from the carrot.
- Organic vs. Non-Organic: While not essential, using organic carrots can minimize exposure to pesticides.
A Cozy Home: Shallow Dish or Container
Your carrot top needs a temporary home to soak up water and start rooting. A shallow dish or container is perfect for this.
- Size and Material: Anything will work as long as the diameter of the container is wide enough to hold the carrot top.
- Transparency: While not essential, a transparent container allows you to see the roots developing.
- Alternatives: Yogurt containers, plastic lids, or even a small bowl will do the trick.
Liquid Gold: Water
Water is the elixir of life for your carrot top, especially during the initial rooting stage.
- Tap Water is Fine: Generally, tap water is perfectly suitable.
- Filtered Water (Optional): If your tap water is heavily chlorinated, you might consider using filtered water, but it's usually not necessary.
- Change it Regularly: Be sure to change the water every couple of days to keep it fresh and prevent bacterial growth.
A Permanent Abode: Well-Draining Potting Soil
Once your carrot top has sprouted roots, it's time to move it to a more permanent home: a pot filled with soil.
- Well-Draining is Key: Use a potting mix that drains well. This is crucial to prevent the carrot top from rotting.
- Avoid Garden Soil: Garden soil is often too dense and can suffocate the roots.
- Organic Options: Consider using organic potting soil for a more natural approach.
A Room with a View: Small Pot or Container
Your newly rooted carrot top needs a pot to call home.
- Size Matters: Choose a small pot, around 3-4 inches in diameter. The pot doesn't need to be anything fancy - a plastic container with drainage holes can work well.
- Drainage is Essential: Make sure the pot has drainage holes to prevent waterlogging.
- Upcycling: Feel free to upcycle! An old yogurt container or a repurposed plastic cup (with drainage holes added) can be perfect.
The Light of Life: Sunlight (Indirect)
Sunlight is essential for photosynthesis, the process by which plants convert light into energy.
- Indirect Sunlight is Best: Place your carrot top in a location that receives bright, indirect sunlight.
- Avoid Direct Sunlight Initially: Too much direct sunlight can scorch the delicate new growth.
- East or West-Facing Windows: These windows typically provide the perfect amount of indirect light.
With these supplies in hand, you're all set to embark on your carrot top regrowing adventure!
Preparing the Carrot Top for Rooting
So, you're about to embark on a cool experiment, turning carrot tops into leafy greens. But have you ever wondered why this even works? It's all thanks to a fascinating natural process called vegetative propagation, which is way simpler than it sounds. Let's dive into the science behind it, so you can prepare your carrot top for success!
This part is crucial.
How you prep the carrot top dramatically influences whether it sprouts new growth or sadly succumbs to rot. It's all about setting the stage for success!
Cutting the Carrot Top: Precision is Key
Think of this step like surgery (minor surgery, of course!).
The goal is to create a clean cut that encourages root development without damaging the crown. Use a sharp knife – a dull one can crush the cells and impede growth.
Cut the carrot top, leaving about one inch of the orange carrot attached.
Why this specific length? This little stub provides the stored energy the top needs to kickstart the rooting process.
It also provides a stable base. It's like giving your little green friend a launchpad!
The Initial Water Bath: Hydration Station
Think of this like a spa day for your carrot top!
Once you've got your neatly trimmed carrot top, it's time to give it a refreshing bath.
Find a shallow dish or container – a saucer or even a repurposed yogurt container works great. Fill it with just enough water so that the bottom of the carrot stub is submerged.
Don't drown it!
Only the very bottom should be in contact with the water.
The water is essential because it keeps the base of the carrot top moist, preventing it from drying out.
This consistent moisture is critical for stimulating root growth. Think of it as sending a signal to the carrot top that it's time to grow!
Finding the Right Spot: Light but Not Too Bright
Just like us, plants need the right environment to thrive. When it comes to your carrot top, think bright, indirect sunlight.
Avoid direct sunlight, especially in the beginning.
Harsh, direct sun can actually cook the carrot top, leading to rot instead of growth. Imagine putting it in a tiny little sauna – not ideal!
Instead, choose a spot near a window where it can get plenty of light, but not be blasted by the sun's rays.
A north- or east-facing window is often a good choice.
Think of it as finding the perfect balance – not too hot, not too cold, just right for encouraging those roots to sprout. Now your carrot top has its perfect incubator to come to life!
The Rooting Process: Patience and Observation
Alright, you've got your carrot top prepped and ready to go. Now comes the part where you have to channel your inner zen master. The rooting process isn't exactly a sprint; it's more like a marathon, or maybe a leisurely Sunday stroll. It's all about patience and careful observation.
Think of yourself as a carrot top whisperer. You're not forcing anything, just providing the right environment and paying close attention to what your little green friend is telling you.
The Importance of Consistent Hydration
One of the most crucial elements during this phase is maintaining consistent water levels. Imagine being stuck in the desert with a tiny canteen – not fun, right? Your carrot top feels the same way if its water supply runs dry.
Regularly check the water level in your dish or container. The bottom of the carrot top should always be submerged.
As the water evaporates, replenish it with fresh water. This not only keeps the carrot top hydrated but also helps to prevent the water from becoming stagnant and potentially harboring unwanted bacteria.
Cultivating Patience: A Virtue in the Garden (and in Life!)
Let's be real: waiting is hard. You're excited, you want to see results, and staring at a carrot top day after day can test your patience.
But here's the thing: rooting takes time. Don't be discouraged if you don't see roots sprouting within the first few days. It can take one to two weeks, or even longer, depending on factors like temperature, humidity, and the overall health of your carrot top.
Use this time to practice mindfulness. Observe the subtle changes, the way the light hits the carrot top, the way the water glistens. It's a great opportunity to connect with nature and appreciate the slow, steady rhythm of life.
Deciphering the Signals: Recognizing Signs of Life
So, how do you know if your carrot top is actually doing anything? Keep an eye out for these telltale signs of life:
New Growth Up Top
One of the first things you might notice is new green shoots emerging from the top of the carrot. This is a great sign! It means your carrot top is alive and kicking and ready to grow!
These shoots will start as tiny little buds and gradually unfurl into new leaves.
Root Development Down Below
Of course, the real magic happens beneath the surface. Gently lift the carrot top occasionally to check for root development.
You're looking for small, white, thread-like roots emerging from the bottom of the carrot.
These roots will gradually grow longer and more numerous. As they grow, they become more capable of absorbing water and nutrients from the soil.
If you see mold or rot instead of roots, that's a sign that something is wrong. Make sure the water is clean and fresh. You can also try using a different carrot top.
Seeing these signs is incredibly rewarding. It's a tangible demonstration of the power of nature. You've successfully coaxed life from what was once considered kitchen waste. Pat yourself on the back!
Transplanting Your Carrot Top to Soil
Alright, you've got your carrot top prepped and ready to go. Now comes the part where you have to channel your inner zen master. The rooting process isn't exactly a sprint; it's more like a marathon, or maybe a leisurely Sunday stroll. It's all about patience and careful observation.
Think of yourself as a plant midwife now, gently assisting your little green friend into its new home. Here's how to give your carrot top the best possible start in soil.
Choosing the Right Soil is Crucial
Soil. It's not just dirt, it's life.
The kind of soil you choose can make or break your regrowing experiment.
Forget about grabbing just any old bag from the shed.
For carrot tops, well-draining potting soil is absolutely essential. Why? Because carrot tops are prone to rot if they sit in soggy conditions.
Think of it like this: they like a spa day, not a swamp.
Good drainage allows excess water to escape, preventing fungal diseases and giving your carrot top's roots room to breathe.
Look for potting mixes that contain ingredients like perlite or vermiculite, which help improve drainage.
Planting Your Carrot Top Step-by-Step
Okay, time to get your hands dirty!
Here's the breakdown:
-
Prepare Your Pot: Choose a small pot or container with drainage holes. A diameter of 4-6 inches is usually sufficient to start. Fill it loosely with your well-draining potting soil. Don't pack it down too hard; you want the roots to be able to spread easily.
-
Make a Hole: Gently create a small depression in the center of the soil, just large enough to accommodate the carrot portion of your regrown top.
-
Transplant with Care: Carefully lift your rooted carrot top from the water dish. Try to avoid damaging the delicate new roots. Position the carrot top in the hole, ensuring that the green shoots are above the soil line. The carrot portion itself should be buried.
-
Backfill Gently: Lightly fill in the space around the carrot top with soil, gently firming it into place. Again, avoid packing it down too tightly.
-
First Watering: Give your newly planted carrot top a gentle watering, allowing the water to drain through the bottom of the pot. This helps settle the soil and encourages root growth.
Sunlight, Nutrients, and Happy Greens
Now that your carrot top is in its new home, it's time to think about providing the right environment for growth.
Think of sunlight as plant food.
While your carrot top was rooting in water, it likely enjoyed indirect sunlight.
Continue this practice for the first few days after transplanting.
Gradually, you can move it to a spot with brighter, indirect light.
Avoid direct sunlight, especially during the hottest part of the day, as this can scorch the delicate greens.
As for nutrients, consider giving your carrot top a boost with diluted liquid fertilizer.
Look for a balanced fertilizer that is specifically formulated for vegetables or herbs.
Follow the instructions on the fertilizer package and use it sparingly, usually once every two to four weeks.
Watering Wisdom: Not Too Much, Not Too Little
Watering is a delicate balancing act.
You want to keep the soil consistently moist, but not waterlogged. Overwatering can lead to root rot, while underwatering can cause the greens to wilt and dry out.
A good rule of thumb is to water when the top inch of soil feels dry to the touch.
When you water, do so thoroughly, allowing the water to drain through the bottom of the pot.
Empty any excess water that collects in the saucer beneath the pot to prevent the roots from sitting in water.
Ongoing Care: Nurturing Your Carrot Greens
Alright, you've got your carrot top prepped and ready to go. Now comes the part where you have to channel your inner zen master. The rooting process isn't exactly a sprint; it's more like a marathon, or maybe a leisurely Sunday stroll. It's all about patience and careful observation.
Think of yourself as a plant parent now. What is the next phase?
Once those little roots start peeking out, and fresh green shoots emerge, you'll know it's time to provide some consistent care. It's not just about plopping it in some soil and hoping for the best!
Here's your guide to keeping those carrot greens happy and thriving.
The Amazing Power of Photosynthesis
Let's get a little science-y, but don't worry, it's easy! Photosynthesis is how plants make their food. They use sunlight, water, and carbon dioxide to create energy.
Think of it like a plant's personal solar panel!
Without enough sunlight, your carrot greens won't be able to produce the energy they need to grow strong and vibrant. So, while they initially enjoy indirect light, remember they need access to some light to stay alive.
Place them in a location that has access to indirect sunlight or partial shade, as this will yield the best results.
From Top to Bottom: Understanding Root Development
Okay, let's be real. You're probably not going to grow a giant carrot from this experiment. The main goal here is to enjoy the beautiful greens that sprout from the top.
Growing full-sized carrots requires specific conditions (soil, nutrients and space).
While some minimal root growth may occur, don't expect a significant root to appear. Just manage expectations and appreciate the leafy display!
Feeding Time: Giving Your Greens a Boost
To keep those greens looking lush, consider fertilizing every few weeks.
A diluted liquid fertilizer is your best bet.
Think of it as a multivitamin for your plant! Just follow the instructions on the fertilizer label and be careful not to overdo it. Too much fertilizer can actually harm your plant.
Choosing the Right Fertilizer
Look for a balanced fertilizer (like a 10-10-10) or one that's slightly higher in nitrogen, which promotes leafy growth.
General Gardening Tips for Happy Greens
Even though you're regrowing from scraps, basic gardening principles still apply.
Here are some essential tips:
- Keep an eye out for pests. Check the leaves regularly for any signs of insects, and address them promptly with organic pest control methods.
- Ensure good air circulation. This helps prevent fungal diseases.
- Remove any yellowing or dead leaves. This will encourage new growth and keep your plant looking its best.
Taking It Outside: Transitioning to the Great Outdoors
If you want to move your carrot greens outside, it's best to do it gradually. This is called hardening off.
Start by placing the pot outside in a sheltered location for a few hours each day, gradually increasing the time over a week or two.
This will help the plant adjust to the outdoor environment and prevent shock. Once they are outdoors, make sure they are still protected from direct sunlight, especially during the hottest parts of the day.
Troubleshooting Common Issues and Extra Tips
Ongoing Care: Nurturing Your Carrot Greens Alright, you've got your carrot top prepped and ready to go. Now comes the part where you have to channel your inner zen master. The rooting process isn't exactly a sprint; it's more like a marathon, or maybe a leisurely Sunday stroll. It's all about patience and careful observation.
Think of yourself as a plant parent, carefully watching over your little green sprout! But what happens when things don't go quite as planned? Don't worry; even the most seasoned gardeners face challenges. Let's dive into some common issues and how to tackle them, along with a few extra tips to boost your success.
Common Problems and Solutions
Even with the best intentions, sometimes our little carrot top experiments run into snags. Here are some frequent culprits and how to address them:
Mold and Rot: The Dampness Dilemma
Mold or rot can be a real buzzkill for your carrot top project. These issues usually arise from overly damp conditions or lack of air circulation.
If you spot mold or the carrot top begins to rot:
- First, promptly remove the affected part with a clean knife.
- Then, give the container a thorough cleaning.
- Be sure to replace the water more frequently and provide better air circulation.
Consider moving the setup to a location with improved airflow.
Pests: Uninvited Guests
While less common indoors, pests can still find their way to your carrot greens.
Keep a close eye out for small insects like aphids or gnats.
- If you spot pests, try gently rinsing the greens with water.
- Alternatively, you could use a mild insecticidal soap, following the instructions carefully.
- Neem oil is another great organic solution.
Yellowing Leaves: A Sign of Stress
Yellowing leaves can indicate several issues, such as:
- Overwatering, underwatering, or lack of nutrients.
Assess the soil moisture and adjust your watering habits accordingly. Remember, consistent moisture is key, but avoid waterlogging.
A diluted liquid fertilizer can also help revitalize yellowing leaves, providing them with the nutrients they need.
Extra Tips for Success
Here are some extra tips to make your carrot top regrowing journey smoother and more rewarding:
- Choose the Right Carrot Top: Start with a fresh, healthy carrot top that shows signs of life. The fresher the carrot, the better your chances of success.
- Water Quality Matters: While tap water generally works, consider using filtered water if your tap water is heavily chlorinated.
- Gentle Handling: Be gentle when handling the carrot top to avoid damaging the delicate roots and shoots.
- Don't Give Up! Sometimes, it takes a few tries to get it right. Don't be discouraged if your first attempt isn't successful.
Managing Expectations: It's About the Greens, Not the Root
Finally, it's crucial to remember the primary goal of this project: growing carrot greens, not new carrot roots. While it's technically possible for a tiny root to start, the chances of growing a full-sized carrot from a top are very slim.
Treat this as a fun, educational experience and a way to reduce food waste, rather than a method for producing a substantial carrot harvest. The carrot greens themselves are edible and can be used in salads, soups, or as a garnish.
So, enjoy the process, learn from any challenges, and savor the fresh, homegrown greens!
Video: Carrot Propagation: Grow Carrots From Carrot Tops!
FAQs: Carrot Propagation from Tops
Will I get a full carrot root by planting a carrot top?
No, you won't get a full-sized carrot root. Carrot propagation from tops primarily yields carrot greens or flowers. The new growth comes from the energy stored within the carrot top, not the development of a new root.
What part of the carrot top should I use for propagation?
Use the top 1-2 inches of the carrot, including the leafy green portion. It needs a section of the carrot itself to sprout. Ensure the top has a flat cut surface where the root was previously attached.
Can any carrot variety be used for carrot propagation?
While most carrot varieties can be used for carrot propagation, success can vary. Organically grown carrots are recommended, as conventionally grown ones may have been treated with growth inhibitors.
How long does it take for carrot greens to sprout from a carrot top?
Typically, it takes around 1-2 weeks for carrot greens to sprout when using carrot propagation from a carrot top. Keep the cut end consistently moist, and provide bright, indirect sunlight.
So, give carrot propagation a try! It's a fun, low-stakes experiment, and even if you don't end up with full-sized carrots, you'll get some beautiful greens. Plus, you'll be reducing food waste – a win-win in our book! Happy gardening!
